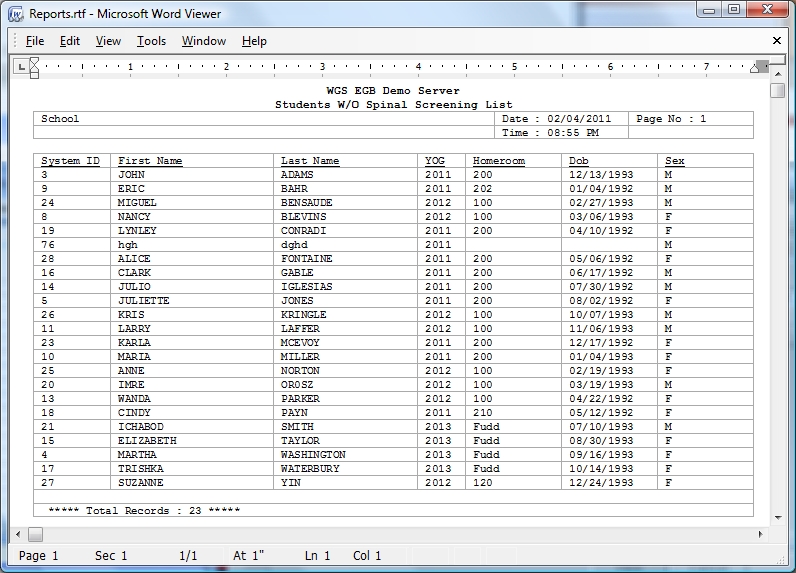
Students Without Records Report
This series of reports lists any student who has no records of immunizations, screenings or no health record at all in the database. For example, if you select Immunizations, students who have no immunization records are displayed. If you select Students W/O Current Information, those students without a check in the Health Data Current box under the Health tab are displayed.
 Steps
Steps
- Click on Administration -> Health Desk -> Health Reports to display the Configure And Print Reports window.
- The Select Report Type field will be set to Health Reports.
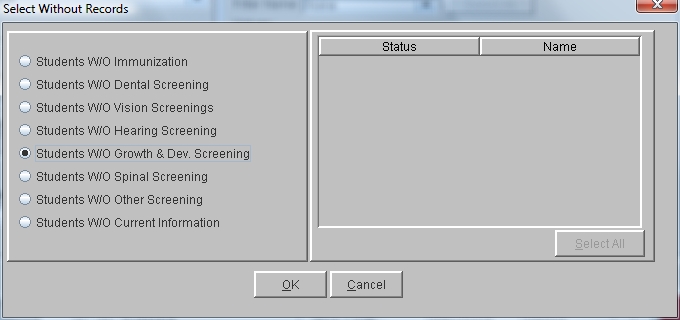
- In the Select Report Name field, select Students W/O Records to display the options window.
- Click on the button beside the option you wish to report on. If you selected Students W/O Other Screenings, the screenings will now display on the right and you must click in the Status box beside beside the desired screening. If you selected Students W/O Current Information, your report will display students without a check in the Health Data Current box under their Health tab.
- Set a date range. Click in the Start and End Date fields and enter the date in mm/dd/yyyy format or click on the three-dot button to select the date from the calendar displayed. Click OK.
- If you wish to break up the report, click on the arrow in the Print One Report For Each field. For this report, you can print a separate set for each School, Homeroom, Gender or YOG.
- If you would like to filter the report, you can pick filter items. For example, to report on a year of graduation, in the Filter Name field, click YOG and then click the Status box beside the year(s) for your report. Filters for this report include Student, Year of Graduation, Homeroom, Category and Sub-Category, and Gender.
- To View or Print: Click View to display the report in the viewer. To print, select File -> Print.
- To Export (to a spreadsheet application): Click the Export CSV button. A default file name and path are displayed. Both of these can be changed as needed. Click the Include Header box to include field titles in the export file. Click Export to begin exporting.


 Steps
Steps

